M

Things to never do: name a file “M” (the reason will become clear later). Then send a lo res off for approval. Six months later, after a computer upgrade and some faffing about with files discover that looking for the file “m” that you’re not sure is even on the computer is almost impossible.

So I redrew the entire thing (well, I reinked it, taking the low res image from a sent email and then digitally inking it). 

Pain in the but.

Anyway, you’ll see what this is for soon.

Ignoring the crowd

Sometimes a writers script will call for a crowd of people, or a crowd of tanks or some other crowd.

As the artist your job is to make the final call on whether that crowd is absolutely necessary. 

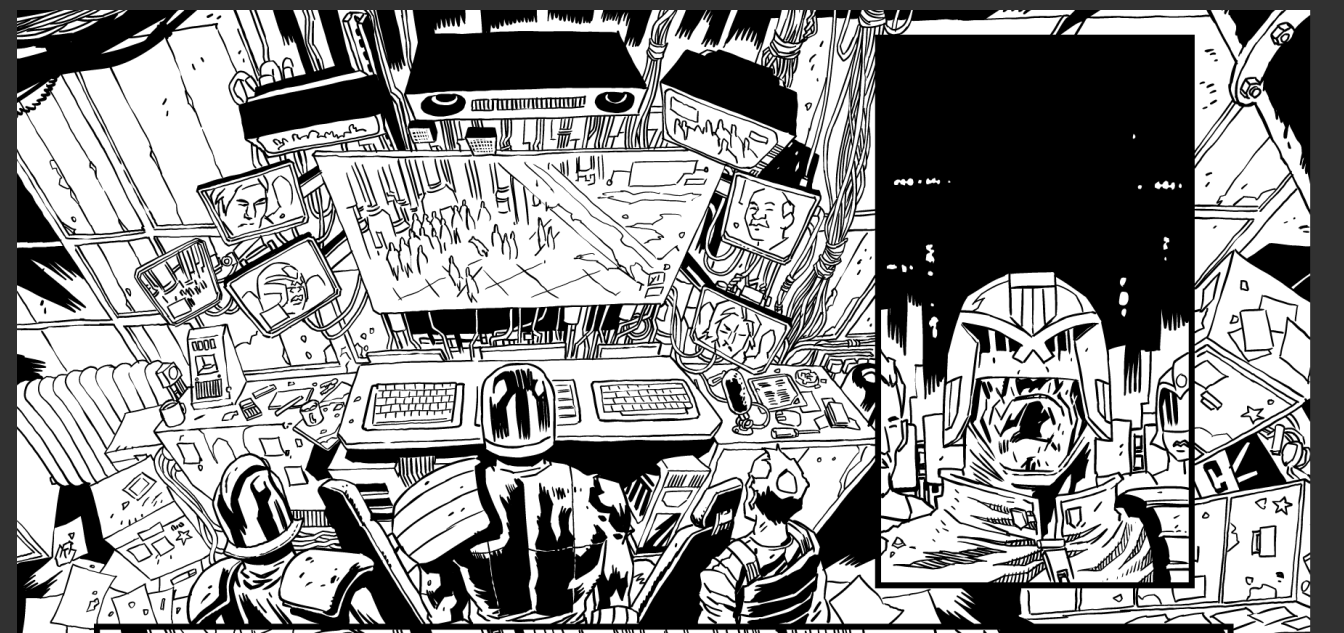
Say you’re drawing a crowded scene in a prison, our hero (let’s call him Alex) has a bruising argument with a big tough prisoner (let’s call him Brute).

Panel 1: crowd of prisoners, we see Alex and Brute. Brute is walking towards Alex.

Panel 2: same crowd. Brute confronts Alex.

Panel 3: crowd. Alex shrugs.

Panel 4: Crowd. Brute Grab grabs him by collar, Alex looks surprised.

Panel 5: Crowd. Alex lands a punch, brute goes down.

Ok, now we have a crowd in every scene.  But the story isn’t that there’s a crowd. The story here is the confrontation between Brute and Alex. That said we DO need to establish a crowd.

So, my parsing of this might be:

On the left, on the right where I’ve dropped the crowd out.

The heart of this story ISN’T the crowd of prisoners (though it’s important for setting the scene). 

Let’s talk through the crowds version first.

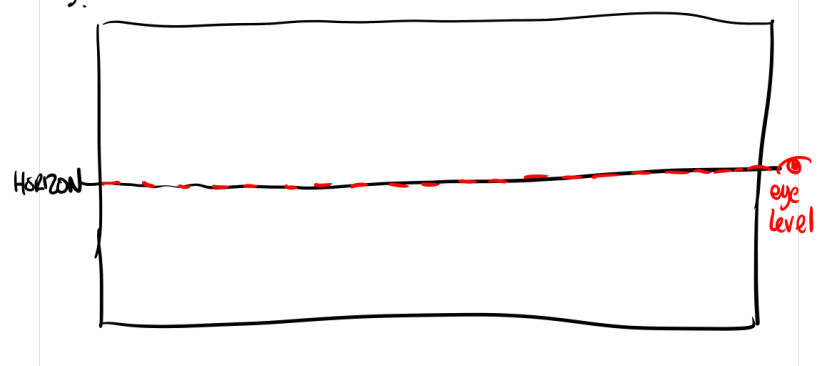
Panel one, I’ve done a top down shot (this helps build the idea of a prison, because it feels like a security cam view) I’ve also placed the crowd AROUND Brute and Alex, with the crowd just milling in no direction, but Brute and Alex focused on each other (that may not be apparent in the very rough sketch, but that’s certainly how I picture it). Long distance.

Panel two, two foreground prisoners help frame the action, background characters mill around. Mid shot

Panel three, Alex shrugs, crowd behind (these shots are pretty clear on-the-nose). Mid-to-long shot.

Panel four, close up of the grab. (Close up pulls us right in, it also, handily, fits better in that panel that a distance shot).

Panel five, pull out for reaction. Mid-to-long shot.

I’m building a rhythm  of shots – trying to make sure, unless we’re doing it for a specific purpose, that we don’t have two of the same shot length together (one page, one action scene, with an establishing shot, makes it easier to do that without it feeling jarring).

We have two characters that are ignoring the rest of the world, and the rest of the world is ignoring them, so dropping the crowds on the second, third and fourth panels here makes sense.

It all helps give, in the reader, a sense of intimacy – the reader is no longer part of an amorphous crowd but is, in fact, listening intently and focusing on the protagonists. (I find dropping background, and panel borders helps do that too)

 On the fifth panel, I bought the crowd back because, it’s a reasonable expectation that prisoners would react if a fight actually started.

On the ‘no crowds’ version, I’ve kept the artwork identical, but, panels one and five aside, I’ve dropped the crowds. This helps the reader feel like they’re drawn in to the conflict between Alex and Brute, their focus is entirely on those characters. Panel 1 I kept the crowd because, well, it’s an establishing shot and is neccessary to give us a sense of where we are. Panel 5, we needed to bring the crowd back in and the percussive action of a punch gives us a good natural, non-jarring moment to make the crowd visible again. (I say non-jarring, the punch itself is supposed to be jarring, so anything you can ladel in to that give it more impact, the better). Also at this point the crowd can be reacting.

Now, let’s say the script called for a third character (“Toad”) who’s listening in on the conversation. He doesn’t take an active part but DOES pay attention (and on the final panel he scurries off when the punching begins).

In that instant it’s important, firstly to spotlight him a bit in the first panel crowd scene (here I’ve tagged the important characters in the first panel as drawn, you can see, I think, how I’ve drawn the crowd to frame those characters) from then on, probably a good idea to keep him on panel 2 as a background player, and then we can drop him as the action unfolds until panel 5 when we see the crowd and Toad. It could look like this:

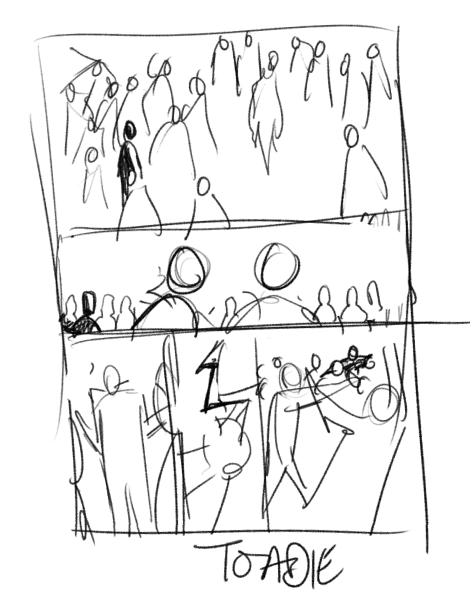
Panel one, having toadie back to us, watching the action (where the others are milling around) and shaded darker, so he looks important despite being in the crowd)

Panel 2, toadie without a crowd looked a little odd, so I’ve added the crowd back, but largely as an amorphous blob representing a crowd – nothing filled in, in this instance it probably works better as a filled colour (if the strip was being coloured) or as a pure white blob, rather than a black silhouette. 

Anyway, never take the writer’s word for it – sometimes you don’t need to draw EVERYTHING.

CRUNCH

I are have been drawing tanks.

Lots of tanks.

Working on episode 1 of a five part Tank story written by Garth Ennis. (Shh! still not officially announced)

This past few months has felt like relentless crunch. Working on Dredd, working on World of Tanks animation stuff for the video game, storyboards for a TV gameshow (WEIRD) and then working on this Tank story. Often concurrently. Now I’ve got two more days of teaching in Dublin (should’ve been the last day tomorrow but the storm delayed everything by one week) rehearsals for a play that will actually be on soon (and thank god, because it’s really eaten in to my Sundays, Tuesdays and Thursdays – despite being a piddlingly small part)

It’s weird, because this year started with nothing lined up at all. In fact, it was looking pretty grim. (Comics is all feast or famine) I was scurrying around offering free work for every new thing I could think of (ended up storyboarding a couple of unmade short films just to get the experience, teaching in dublin – just for the money, and panicing a lot).

No one teaches you how to manage money in comics. And it’s bloody hard. Your best year financially can be the prelude to your worst year financially. One good year and the sudden tax burden in the next year, triggering of student loan repayments, oh look, now I have to pay back tax credits from two years ago and whoopsie, you’re financially destitute.

Luckily, this year should be a particularly good one, and my aim is just save like a mofo and very strictly pay myself a minimum salary, and keep the rest for tax and unexpected bills (I won’t need it all, and once I’ve paid tax I’m due and bills I’ve acrued, maybe … MAYBE… I’ll actually have some savings, that would be nice)

As it is, I’ve no idea what’s happening after I finish all this tank malarky, come May and it may, once again, be famine time.

In the eye of the storm.

Today has been an odd day.

After months and doing two jobs simultaneously, one job finished totally and the other … well, the other was paused while I waited for approval.

So yesterday I finished off a pitch thing, hopefully it’ll go somewhere, but you never know – can’t invest too much in them personally.

Today was chatting to a writer about a project I’ll be starting soon (back to two simultaneous projects) but can’t make any sort of start on it, because, well, he hasn’t.

Tomorrow heading off to spend a day with a tv production company about storyboards (A while ago I found where all the local tv/media people hung out on facebook and asked if they wanted any free storyboarding from a 2000ad veteran, got a bunch of requests and did as much as I could – if I had the time I’d still be pursuing a lot of these, there was paying work in there, but finding it was time consuming. One production company though, offered me paying work off the bat, and tomorrow is more of it).

Kids off school due to the Hurricane that hardly happened (why where the off today? who knows) and for one brief moment my wife and kids were all out of the house, and for the first time in several months I had literally no work to do.

Finally got approval an hour or so on the pencils for the big project, and of course, the delay has made me a little late, so tomorrow it’s back in to it. 

But that weird feeling of having nothing on sort of haunts me. Like a freelancer’s nightmare.

Thumbnails

Exhausted. 20 Pages thumbnailed. Find it totally exhausting. These are digital thumbs, which I tend to draw more detailed than normal thumbs (since I can really get in there).

Having now drawn a half dozen pages of draw overs of tanks I’m starting to find I can actually bang out a few tank shapes without reference. This should get easier. Should make the inking easier too.

Now the wait for approvals.

Two things down…

That’s Dredd 6 parter finished! Hurrah!

And some art for a pitch thing! Hurrah!

Now just a five part 20 pages thing to finish, a seven page thing I promised someone ages ago, and uhm… I think I was doing inktober.

Ink

Owing to severe weather conditions, this week’s comic class in Dublin has been cancelled. I’d intended to get everyone inking some blue line art. So instead, I’ll talk about inking here.

There’s a few terms you’ll need to know:

Spotting Blacks – this is the process where-in you decided where to place black ink on the page. Spotting blacks well can make a page pop, steer the readers eyes and make the page finished.

If you’re unsure about where to spot blacks on the page, best thing to do is grab a big fat marker and spot some blacks on a reduced photocopy of the art. 

BWS – Black With Stars – a pencilled instruction, indicating to the inker that you want Black – WITH STARS. Stars are often done with white ink on black – and, unless there’s a very specific look you’re after, it’s far easier to leave that to the inker (I’ve seen some pencillers who will ink certain bits of the stars they want because they’re after a specific thing).

X – X marks the spot. To be filled with black ink. and X in a bit of open pencils usually indicates the penciller wants that area to be filled with ink.

Dead line – no, not that one. A dead line in inking is a line that’s got not variety of thickness. Dead lines tend to look lifeless and flat (hence ‘dead’) and are to be avoided on anything really.

Tools:

Nib Pens – There’s a whole bunch of nibs worth picking up, and an inkers arsenal will often have a variety of sizes and “bounce”. Nibs can be stiff, or soft, and this will fall down to your preference. The most common nibs are:

Kuratake G Nib – A stiff nib for general line inking. 

Hunt 102 – A fine lined, stiff nib – good for detail.

Hunt 107 – a fine lined, soft nib – good for detail. Pick one based on your preference.

A good inker can ink with pretty much anything, and each tool will do something different, but these are a fine set of nibs to start from. Here’s a decent set (ask for it for xmas! http://amzn.to/2ykKOXz )

A new nib will need cleaned (it’s covered in a protective film) either wash it with warm soapy water and dry thoroughly, or burn it off with a lighter (just a quick swipe with the flame should do it).

If you don’t, it’ll likely work fine, but it may take a little while to settle down.

You’ll also need to buy a pen holder.

Brushes – best advice on brush inking is to buy a variety of tools and try them all. Some people will be comfortable with a thicker brush and some with a thinner. The brush offers the best of all inking tools, but can be a devil to get right.

It can make even the dullest straight line look organic and attractive.

Here’s a video I made on using a ruler with a brush or a nib to rule a straight line (it’s a surprisingly uncommon bit of knowledge)

https://www.youtube.com/watch?v=WftBA4BbaSM

Brush use:

The brush has a number of component parts: The tip, the body, the ferrule (the metal bit joining the brush to the handle) and the handle. 

When inking, avoid getting ink near the ferrule – anything there can dry and harden and ruin the brush (never through away a ruined brush as you can still use it to get some interesting textures)

Wash the brush frequently in clean water. I dry it by twisting the whole brush as I draw it down over some tissue (kitchen roll is best)

This is one of my favourite brushes (amazon has it a bit pricey, you can buy these cheaper locally, I’m sure) http://amzn.to/2ylB1jV

But more brush artists prefer a larger brush like this Winsor and Netown Sable Brush http://amzn.to/2ynvGpL

Nibs and brushes though often considered the best option, aren’t the only thing, there’s a lot of great pens available – where you can you want to stick to something water and light resistent, I’ve used some of these in the past:

Zebra Brush Pen – one of my favourite inking tools, flexible, always ready, waterproof and apparently lightfast. I’ve used the Medium pen here, and I’ve just ordered a set of various sizes and excited to play with them. http://amzn.to/2ypEqvL

Micron Pigma Pens – these come in a variety of sizes, which is just as well, as unlike brushes (or brush pens) these can only give you a sort of dead-line though you can get a fair amount of variety if you repeatedly go over a line with a pen and introduce different thickness.

Pretty great for drawing background details though where the dead line isn’t always a drawback.

Just be careful to get original micron pens, as there’s a bunch of counterfeit options out there that aren’t as lightfast nor as good. Here’s a full set to play with http://amzn.to/2ypln4B

Here’s a few files to play with (from mine and Rob William’s story “Nurture” published by 2000AD.) I’ve given you what the pencils and inks look like as well as blue line versions of the pencils and blue line versions of the inks. If you’re feeling brave, print the pencil bluelines and ink that. If that’s a little daunting (and it is because my pencils are pretty sloppy) then print the blue lined inks and try inking from those. Let me know how you get on!

5 ways to bluff perspective like an expert.

Well, maybe more.

1. Know the horizon line and the eye level. They amount to the same thing, except the horizon line is the furthest point in the distance (where the horizon would be if the world were completely flat and didn’t have mountains/lakes or buildings in the way) and the eye level is a line that runs exactly through the horizon line except it’s where you’ve placed the viewer of your image, so represents as close as you can get to the viewer.

(A wobbly horizon and wobblier eyeline, but just imagine one is going right through the other!)

2. Things that are closer to the eye line are larger. Things that are further from the eye line are smaller! (I know, this is remarkable stuff!). When you’re dealing with drawings though, this isn’t quite enough, because, who’s to say that two squares floating in space, one smaller than the other in 2D aren’t just two different sized squares floating side by side? Then you need to bluff.

3. Overlapping helps your brain organise which items are in front of and behind other objects. Overlap a large square over a small square and it looks like the small square is much further away (join the squares up at the corner and voila! a cube!)

4. Use the eyeline as a way to hang things the same height as the eye line – so if your eyeline is 5’4″ (I’M SHORT – DEAL WITH IT) up then anything that hits that eyeline will appear 5″ 4′. It’s just the way our brains handle it.

5. If something is taller or shorter than the eye line, figure out where the eyeline would intersect it and place all your objects where on the eyeline where the intersect.

That’s it. You don’t need no steenking vanishing points.

I’m going to be delving into these topics in much more serious depth, BUT only for patreons, I’m afraid. If this is the kind of knowledge you want then sign up for the Backstage pass. I’ve limited numbers of $5 passes so if you’re in early you’re paying half. Otherwise it ten bucks.

I think perspective is a subject that too many people are afraid off because it very quickly becomes an exercise in technical drawing. You’re drawing hundreds of lines for guides before you get to do anything creative. But I’m pretty sure there’s an awful lot of stuff you can do without playing that game. Join me and you’ll see.